How to get into audio book narration: Auditioning

You’ve got your audio booth all set up, you got your equipment set up perfectly for your place and your voice, now you just need to book a job. How do you do that? What does an audition consist of?

Auditioning

Audition Sides

Once you’ve got a book that you’re auditioning for you’ll be sent a section of the book or a chapter, or, on rare occasions the entire manuscript – these are the sides. Read what you’ve been sent. Just read it first as if you’ve bought the book and are reading it for pleasure. Then the next time you read through it, identify all the characters that speak in the section you are using to audition whom you will have to give different voices to and note any accents, dialects, speech impediments, unusual cadences, etc. Now pay attention to the tone of the book. Who is the narrator, is it a character in the book? Are there more than one narrators? At this point look at any notes the author or publisher has given you about the story and the characters, usually they give a brief description of what kind of tone they want, e.g. sarcastic, feminine, storyteller, straight forward. Also note any specifics they tell you about any of the characters. If you aren’t given any additional notes about the reading and the text doesn’t make it very clear who these characters are, you can do a couple of things:

  • Ask the author/publisher to give you a description of these characters and ask if there is anything you should know about the characters before you do the audition. A character may have a Jamaican accent, but the portion of the book you were given to audition with is past the section where the reader is told that vital information and therefore you would have no way of knowing.
  • Record a couple of options. In the same file, record one way, the way you best perceive the characters to sound like and then once that is done, say that you are offering another option since one or more of the characters could be voiced in a completely different way, then read the same exact text with the different possibility.

What Goes into an Audition Recording

A general rule of thumb that about 5-10 minutes of completed audio is sufficient for auditions. Don’t get overwhelmed or upset that you’re sent a 20 page chapter as your audition material, the author doesn’t know better. Authors are in the business of writing books, not prepping audio book auditions. More often than not they have no idea how many words make up one minute of an audio recording. Do you? If you don’t, here’s a great website that can give you the time estimation for your text. You can either enter the word count; paste in the text; or enter the average words per line, number of lines, and pages and it will spit out a time for you.

http://www.edgestudio.com/production/words-to-time-calculator

Start your recording by slating. What’s slating you ask? It’s a brief introduction of who you are and it consists of you saying: “Hi, this is ______ auditioning for _______ written by ________.” And that’s it. DO NOT talk about yourself, add any additional information or ramble on. Anything more than your name, book title and author name will come across as very unprofessional and they’ll probably stop listening to the recording at that point.  Remember that the producer, author, publisher, casting director, or whoever is listening to your audition is under no obligation to listen to the entire thing. If they’ve heard 30 seconds and decide that your voice sounds way too old for the book,or not right for what they want then they hit stop and move on to the next audition.

Editing and Mastering

Yes, you must submit an audition exactly how the completed audio book will sound, so if you’re expected to edit and master the audio book, you had better do a good job with it in the audition file or else they will assume the mediocre file you rushed through and sent to them is the best quality you can provide and will move on to the next audition. Once you’re happy with the recording and your mastering of the file, listen to the whole thing again with your eyes closed. Hear it how the powers that be will hear it. If you’re not happy with it, then re-do it. If you don’t like it, they won’t like it.

Submitting the Audition

It’s not enough just to send the file, you must add a cover letter. Just as you would for a job that you’re applying for, you wouldn’t send your resume without any kind of cover letter. It doesn’t have to be much, just introduce yourself, let them know you are interested in producing/narrating the book and give some background about yourself – how many books have you narrated, any awards you’ve won, a link to your website, your accent/dialect range, etc. Also let them know what you’re going rate is if it’s not listed in the audition information. Let them know that you or your agent are willing to negotiate on rate (only if it’s true). Remember, they don’t know you, they are not going to assume you are the most experienced narrator out there, you’re an unknown commodity to them, a risk, you have to give them confidence in hiring you for the job.

Sit Back and Wait

After you’ve submitted your audition you will have no idea how long it will be before you hear anything back from them, if at all. Do not pester them, that won’t help you. If it’s been 2 or 3 weeks, you may drop a note asking if they’ve had a chance to listen to your file, but then leave it at that. They might come back and tell you that they haven’t started listening to the auditions yet, or they still have many to go through, or they may not respond to you at all. Then let it go and move on to the next audition. You’ll book some of the auditions and you won’t book others, it’s the business, don’t take it personally, just keep using the auditions as an opportunity to keep honing your skills and comfort of recording.

Booking a job

Jump around and celebrate then get to work 🙂
Next audio book: Resist by Anne-Rae Vasquez

I’m very excited to begin working on my next audio book project, Resist by Anne-Rae Vasquez (Among Us Trilogy book 2).

Resist by Anne-Rae Vasquez

About the book:

In a fight to save human kind from obliteration, Harry and Cristal continue to battle against the dark forces. However, the supposed angel forces have given up on mankind leaving Harry and Cristal in a terrifying dilemma. Can online gamers save the world? Harry Doubt thinks so. For readers who have a twisted delight in books with an “End of Times / Armageddon” theme and are fans of shows like J.J. Abrams “Fringe” or Glenn Gordon Caron’s “Medium”. In book 2 of the Among Us Trilogy, Harry and Cristal have to maneuver both earth and the spiritual world. In a fight to save human kind from obliteration, they must seek to uncover more details behind Global Nation’s involvement and research involving their parents and other missing loved ones. Not only must they battle against the dark forces, the supposed angel forces have given up on saving mankind from itself leaving Harry and Cristal in a terrifying dilemma. Can online gamers save the world? Harry Doubt thinks so. 

The audio book will be available in May. Check back soon for updates on my progress.

How to get into audio book narration: vibrations and shock mounts

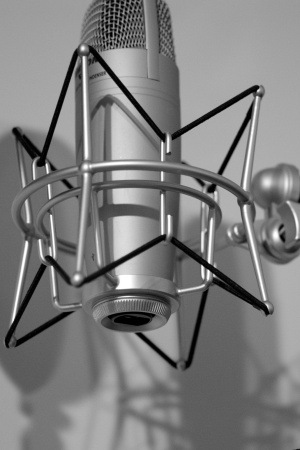
In my post about audio equipment, I forgot to mention one other little item that you’ll need. A shock mount. This wonderful little device that looks like an alien contraption makes a huge difference to your recording.

5431231488_d6d66fa93f_o

Spider shock mount. This is what I use.

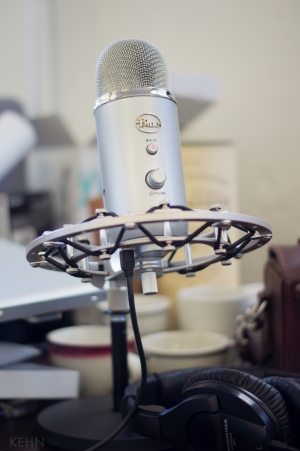
Yeti

3562865913_510b1d81a6_o

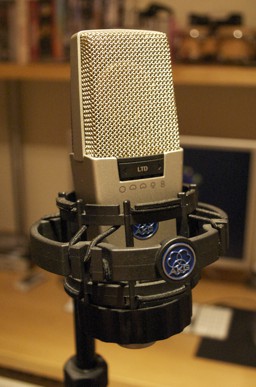
They come in all different styles, and really, it doesn’t matter which one you use, it’s just your personal preference. They all work the same. They’re not very expensive, and you can get one on Amazon, eBay, or probably even a local pawn shop for dirt cheap.

The better the microphone you have, the more vibrations it will pick up and you definitely don’t want that irritating noise in your recordings. A shock mount holds the microphone suspended above a desk or floor and helps isolate the microphone from unwanted vibrations that can come up through a mic stand or a desk. It’s similar to the shocks on your car, there is bend and give to the shock mount that moves and diffuses these vibrations so that you don’t hear (or feel) them.

Most shock mounts come with a little attachment that gets connected to a microphone stand and you can use it in any direction you want – upside down or right side up. Or, you can place the shock mount on a table top and not use a mic stand. If you put in on a hard surface, you’re likely to pick up more vibrations that come through the floor or that touch the table. I don’t use a mic stand because of the small space in my booth, I have the shock mount on my table top, buuuuuut I have it sitting on 4″ of acoustic foam that is also on top of a small rug that covers the entire table surface. I’ve found that this set up works just as well as if I had it on a mic stand. Dampening any reflective surface and keeping the shock mount and microphone as distanced from any hard conductive surface as possible is what you’re going for.

IMG_6520

My mic and shock mount set up sitting on 4″ of acoustic foam.

And this is also why you always wear headphones when you record, not just to hear yourself, but only through headphones will you hear the unwanted noise and vibrations that your mic may be picking up and recording behind your fantastic voice. When you hear these bothersome sounds, either pause recording until the sound passes (if it’s a truck or train or something short in duration) or make adjustments to your mount and sound isolation materials in your booth to block out that noise.

Like I’ve said before, at the beginning there is trial and error with your set up until you find what works best for your situation. Don’t get discouraged or too frustrated, you only need to find the right balance once, then you’re golden from then on out.

How to get into audio book narration: recording

Alright, you’ve got your recording equipment, you’ve got your booth set up, and you’re excited to start recording. But what exactly do you do and how do you do it? Let’s talk about the technical things first:

  • Make sure all extraneous noises are as controlled as possible e.g. turn off fans, loud a/c units, washing machines, tv’s, etc.
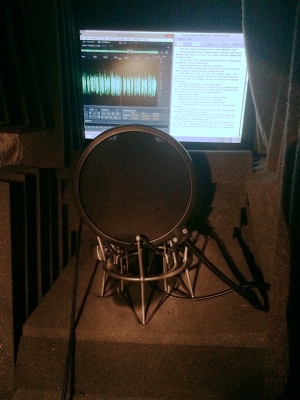
  • Have your pop filter placed in front of the mic, but not touching it, so that it helps diffuse the plosive sounds that you make while speaking which would be uncomfortable to hear.

457979032_6dec4ab05e_o

  • Warm up your voice and your articulators (lips, teeth, tongue), sloppy speech and narrow vocal range won’t get you any jobs. And make sure you’re hydrated. Keep a bottle of water handy for your recording.
  • Situate yourself about 6″ from the microphone. That means your mouth should be 6″ away, nothing else matters. You may have to adjust between 4″ – 8″ depending on your voice and the quality of your mic. Play around with a few sample recordings and find the best distance for your voice.
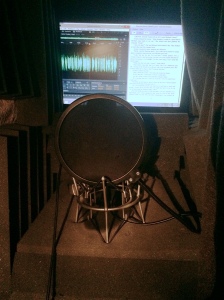
  • Turn on your monitor and open your recording software in a window on one side of the screen and the text you’re reading in a window on the other side of the screen. If you’re not using an electronic text, make sure the pages you’re reading from are placed directly in front of your face, not down on a desk. If you’re reading something that’s placed lower than the microphone, your mouth is no longer in front of the microphone and your voice will bounce off of the hard surface of the paper creating an echo. Always place your text (hard copy or monitor) directly behind or slightly above the mic so that your mouth is in the proper place when reading.
  • Double check that all of your recording levels are where they should be and open a new audio recording file. I use Adobe Audition as my DAW software and I’ll go into the specifics of navigating that program in another post.
  • Record 1 minute of room tone. That means sit still and be perfectly silent while your mic records the ambient sound of the room. Ideally it should sound like absolutely nothing – no buzzers, fans, dog’s barking, children running, trains passing, refrigerators humming, stomach growling, etc. It’s not absolute silence, you’re not in a vacuum. It’s very uncomfortable to listen to true silence (no sound at all), so don’t think you’re being clever by “muting” a section of the recording as your room tone. The room tone you’re looking for just doesn’t have any additional identifiable noises in it, or sound like white noise. Save this as a separate file.
  • Start your chapter. Always begin with the chapter heading e.g. ” Chapter one” or “The Muse of the Sea” or whatever else is titled there. Then pause. You’ll have the ability in editing to add the proper amount of space between the chapter title and the first paragraph, but it’s a good habit to get into to give that leeway in recording. The general rule of thumb is about 2 to 2.5 seconds. Whatever length you use, keep it consistent throughout the entire book.
  • As you begin reading the material, keep your voice at normal speaking level, if you need to raise your voice, shout, scream or anything that will raise the decibel level enormously, be careful. If you shout or scream into your mic, you could risk blowing it out. Even if you don’t ruin your mic, you will end up recording terrible distortion and will end up re-recording it later. Pull back away from the mic if you need to get really loud or turn your face at an angle to the mic so that the sound isn’t hitting the diaphragm of the mic head on.
  • Enjoy what you’re reading. Pretend that you’re talking to one very specific person and that will help your narration sound more natural and not like a phony PSA. Each character should have a different voice so that the listener can discern between the characters. Do a sample recording of each character’s voice and save it in your files so that you can always go back and reference it if you forget what the person sounded like when you recorded them in chapter 1 but then they didn’t reappear until chapter 19. There’s nothing worse than characters who’s voice change throughout a book, it makes it very hard to keep track of the characters.
  • Practice breathing. You don’t want your recording to be filled with constant inhales that interrupt the dialogue and are jarring to the ear. I’ll show you later how to remove those from the recording, but you will save hours of time in the editing phase if you can limit your breaths while recording. Try to be able to read an entire sentence on one breath. Don’t squeak out the last couple of words if you run out of air, better to punch in a new recording with a deeper breath.

Audition 1

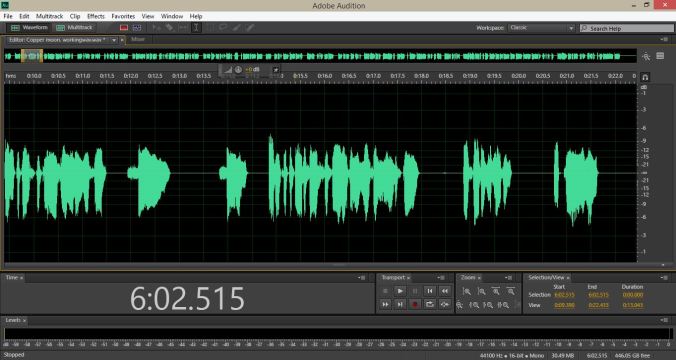
  • Punch recording is where you record some audio, realize you’ve made a mistake or a dog started barking in the middle of the line, etc. and you have to re-record that section. It might seem easier to just keep the bad recording and then record a better take in the same file right afterwards. Trust me, you will hate yourself for doing that once you get to editing. Punching in means you stop or pause the recording and move the cursor back to the beginning of the sentence or paragraph you want to re-record on the waveform. Then you start the recording again from that spot. At first it’s very confusing, but after a while you’ll learn to see the waveform and recognize where the breaks are and where you should most likely start. Move the cursor there, hit play and listen to make sure you got the right spot, then move the cursor back to the location and start recording.
  • At the end of the recording, leave a good 10 seconds or more of room tone before you stop the recording. You will want this for when you need to capture the noise print for removing unwanted noise from the file in the editing process.
  • SAVE YOUR FILE. This is your master recording. It’s a nightmare when an audio file gets corrupted, deleted, or anything else that would cause you to need to go back to your original file. I don’t know any narrator who hasn’t had that experience at least once, so don’t think you’re immune to Murphy’s Law. Back up this file as well. Throw it on a travel drive, in the cloud, on an external hard drive, or anywhere else you can think of. Then make a copy of this file and this is the file you will use to edit. NEVER edit your master file, because if something happens to it, your only option is to re-record.

So you’ve finished your first recording, congratulations!! Next post I’ll talk you through the editing process.

How to get into audio book narration: Making a recording booth

Ok, you’ve read my last post and got excited about becoming an audio book narrator so you jumped on Amazon and ordered your microphone and headphones and are obsessively checking the tracking on your package every 10 minutes.  In the epically long three days or so that you have to suffer through without your new equipment, this would be a good time to set up your audio recording booth.

Location

Where are you going to set up your booth?  Maybe you have a spare room in your home, or a section of your basement that you can dedicate to your new endeavor, but what if you don’t?  What if you live in a small apartment or all of your living space is filled up with other furniture and things?  Start in a closet.  If you can free up about 4’x3’x5′, you’re golden.  In a standard bi-fold closet door space, that’s just 1/2 the closet. Ideally your booth is nowhere near a furnace, a/c unit, refrigerator, or other electronic devices.  If you have no choice but to put it near these things, then you’ll have to compensate with a lot more sound proofing, but we’ll get to that in a minute.  The more isolated your booth is from any external noise, the better.  Closets do work very well if the other half is crammed with clothes, that always helps to dampen sound. It may not be pretty, or something you want to show your guests when they come over, but it does the job.  If you’re making a booth not in a closet, try to put it in a corner or at least have your back (when you’re in it recording) closed off.  If your back is to a wide open space you’ll be picking up all the sounds from behind (and above) you and you’ll get an echo in your recordings from your voice bouncing off the far walls and returning to the mic.  The farther away the back wall (or ceiling) is from you, the worse the echo will be because it takes sound that much longer to return to the mic.

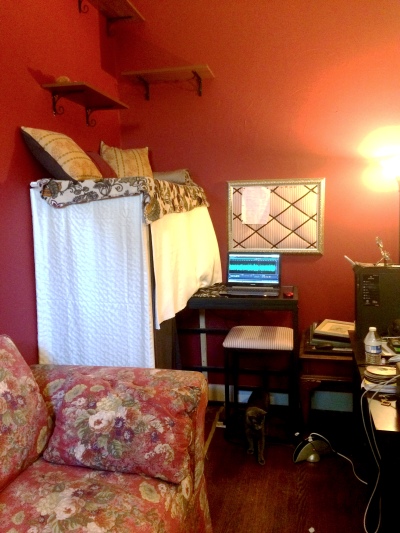
My recording booth in the corner of my office. Since my cats feel they are part of my process, I built them shelves and comfy sleeping space on top, which helps keep them out of the booth.

My recording booth in the corner of my office. Since my cats feel they are part of my process, I built them shelves and comfy sleeping space on top, which helps keep them out of the booth.

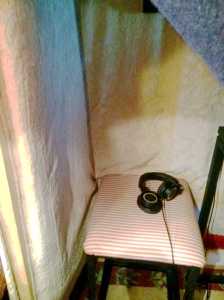
You can see in the picture of my booth that I’ve chosen an interior corner spot.  I don’t need much room, so a booth this size works perfectly for me.  This is what it looks like on the inside:

IMG_6519IMG_6520

I don’t have an interior light because I don’t need one.  I have a monitor hanging on the back of my booth and I run it to my laptop which sits outside my booth so I don’t have to worry about the laptop’s fan causing any unwanted noise in my recordings.  I prefer to read off of the screen instead of loose leaf paper, then I never have to worry about page turning noise or other paper shifting sounds, plus I can always adjust the size of the font that’s comfortable for me to read. I can easily just scroll along on my screen.  If you’re not going to use a monitor, then you will need to add an interior light and you’ll probably prefer a music stand to set the papers on rather than a table top.

What materials should you use

  • 2x4s
  • A couple of sheets of luan or heavier plywood
  • moving blankets
  • fiberglass insulation roll
  • acoustic foam squares
  • blankets/sheets/fabric
  • rug

The idea is that you’re building a little room that should dampen any exterior sounds that would interfere with your recording.

  1. Measure out your space and build a small frame out of the 2x4s. If you can anchor it to the walls, even better. Attach the luan or plywood to all sides (except the entrance). I had to use a plywood on top because my cats like to jump down from their highest perch (and scare the hell out of me) onto the top of the booth, so that wood had to be able to withstand the abuse. Don’t attach the top yet, just the wood around the sides. Trust me, if you do, you’ll be cursing yourself all night for making a little dark room where you can’t see to attach your insulation.
  2. Unroll the insulation and using a staple gun, attach it in long strips all around the inside of the booth. Even attach long hanging strips over the entrance. Make sure to keep the paper size of the insulation facing towards yourself, no need to get fiberglass all over yourself. Now staple more insulation to the side of the wood top that will be the interior side.
  3. Take your moving blankets (sheets, fabric, or other quilts will work too, but moving blankets have a much denser weave and much more effective acoustic absorption) and staple these over the strips of insulation. This has a dual effect – it will both add more sound absorption to your booth and also protect you from the fiberglass. As for the exterior, you can just use sheets, blankets, fabric to cover around the booth – this is only for aesthetic, so it doesn’t matter what you use here.
  4. Place your little roof on and your’re ready for the final pieces.
  5. Now you can add the acoustic foam. Foam acoustic squares can be very expensive, but I’ve always had good luck getting them very cheap on eBay. Many companies will sell remnants in 12″x12″ blocks. You can probably snag a batch of 50 for around $40. Line the inside of the microphone area with these squares. All around, fill in as much space as you can, even on top. If you have extras, fill the rest of your booth with them as well.
  6. Put your rug down underneath and the booth is ready for recording.

What goes inside the booth

You need one of two things – either a table/stand of some sort or a music stand and some place to sit. I prefer to use a stool in my booth over a chair, it takes up less space and I can easily adjust how I sit for better vocalization and proper breathing. Some narrators prefer to stand, but if I’m talking for 4 hours a day, I don’t want to be standing the whole time. Set your monitor up if you’re using one, and set up your microphone. Your mic should be placed about 6″ from where your mouth will be. We’ll get into mic placement and recording techniques in another post.

You’re all set up and ready to get started recording, so until the next post when I talk about recording techniques, find yourself a good book that you want to use for a demo and get familiar with the text.

How to get into audio book narration: Getting Started

I’m an audio book narrator, as well as an actress and a director, and the question I get asked most often is how I became an audio book narrator and how can others do the same.  People love audio books, the market has grown considerably now that they can be easily downloaded onto iPods, smartphones, computers, etc.  Doesn’t it sound like fun, being able to read a whole book and act out all the characters with different voices?  It is fun.  It is also a lot of work.  So, if you’re serious about wanting to narrate audio books, then I’ll talk you through the process, but if you’re not willing to put in the time to get the proper equipment and learn how to use the software, then just enjoy listening to audio books and find another blog to read now.

13430490054_08f8daa7f6_o

Getting started

You’ll have to have a decent microphone.  No, your iPhone isn’t good enough.  There are a lot of apps out there that claim to be noise cancelling and give you high quality recordings, but in truth none come close to what a condenser microphone is designed to do.  Everyone else in the industry is using an actual microphone, you need to as well.  You need a cardioid mic because its polar pattern reduces pickup of sounds from the sides and behind it, almost isolating sound pick up to just directly in front of it.  You don’t need to spend a fortune, an Audio Technica AT2020 USB+ will run you around $130 these days and is an excellent mic.  I prefer a USB mic because I can plug it directly into my laptop and record directly to my hard drive.  The + means that it has a headphone jack built directly into the mic so you can attach your headphones and listen to yourself as you record – which is paramount when recording audio.  And that leads to the next item…a good pair of headphones.  Headphones come in all sorts of varieties for all sorts of listening needs.  You need headphones that will give you a true sound of what you recorded, not the Beats by Dr. Dre which punch the bass so heavily that what you record sounds very different when played back over headphones like Beats vs. a computer or car stereo.  Ear buds are not the way to go.  You really need over the ear headphones that cancel out as much ambient noise as possible.  Audio Technica makes the ATH-M50s which are great for audio narration.  There are other brands out there that make equally good equipment, but for the quality and price you can’t go wrong with Audio Technica.

Software

Ok, now that you’ve got your equipment, what software should you use? You’ll need to use DAW, which stands for digital audio workstation. In other words, an audio editing program. There’s a free downloadable program Audacity that’s great for getting started. It’s easy to learn and gives you a wide range of features. Once you’ve gotten comfortable with how to use the software (another post on how to use DAW software will be coming soon) then you’ll want to upgrade to a more sophisticated program. I’ve been using Adobe Audition for a couple years now and like how user friendly it is with all the features I want. Right now you have two options with Audition, either buy the program outright for somewhere around $300 or else get a monthly membership with Adobe for about $20/month.  You will record directly to your DAW and then edit and master your tracks with it. Or, if you don’t want to spend the time editing your recordings yourself, you can hire someone to do the work for you, but you’ll end up paying them so much that, in my book, it’s not worth it. That it unless you have a teenage or college aged kid at home that wants to pick up a few extra bucks and make her mom/dad happy by editing the files for a pittance.  If I had that option, I would happily make someone else edit my work for far less than what it’s worth, but my cats aren’t likely to take me up on that offer.

Recording Booth

And the final element that is the last mandatory piece to your set up is a recording booth. You don’t need much space, just enough room for your body, actually. If you’re a wild gesturing person that can’t keep your arms from waving down airplanes while you speak, you might need more space, but smaller is better if possible. My first booth was in a closet. I’ve since upgraded to a booth I built, but an enclosed space that has very little reflective surfaces is a great place to start. I’ll post another blog on making the ideal audio booth and what to avoid, it’s not that difficult really – or expensive. There are a number of YouTube videos on how to build a booth very cheaply, check them out or wait for my next post.

If you’ve read this far then you’re probably genuinely interested in audio narration and want to know the details on each of the sections I touched on. More posts will be coming focusing on each of these aspects and going into great detail on how to make these work for you.

Thanks for reading and follow my blog for more!